
Quick Definition: How to Set Up a Starlink Hotspot
To set up a Starlink hotspot, connect Starlink, join its WiFi, configure it in the Starlink app, then connect a MikroTik router and access points to share and manage paid WiFi.
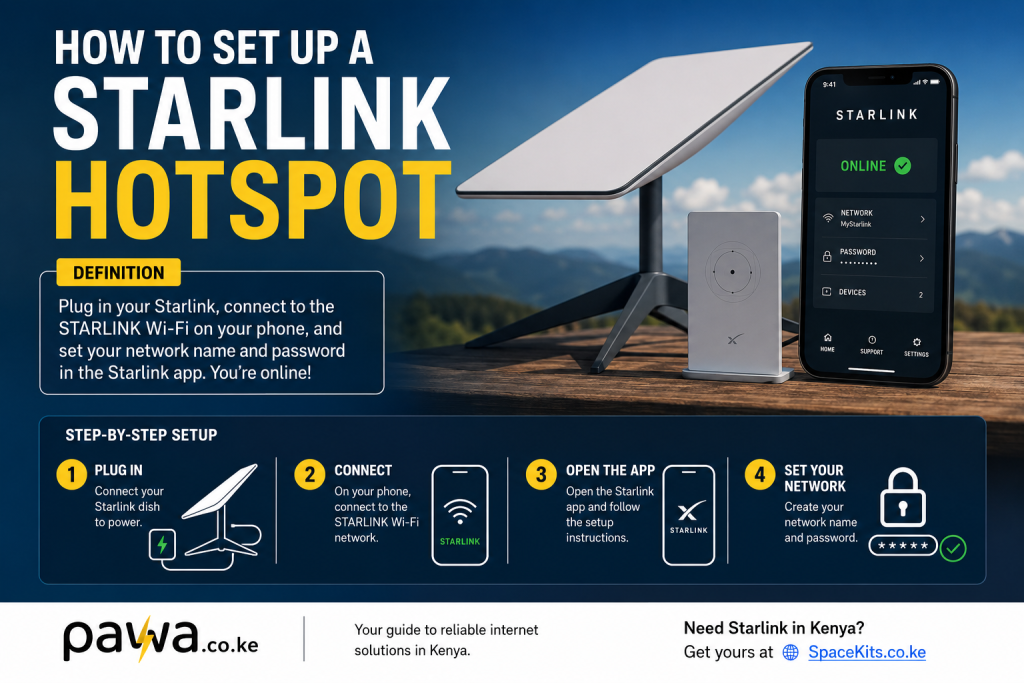
That is the simple answer to how to set up a Starlink hotspot.
If you are setting up Starlink only for your home, the process can be very simple. But if your goal is to create a commercial WiFi hotspot, the installation is only the first part. You also need a network that can distribute the Starlink connection across your target area, control user access, sell internet packages, collect payments, limit bandwidth, and automatically disconnect customers when their packages expire.
That is where the difference between ordinary Starlink WiFi and a Starlink-powered hotspot business becomes important.
Starlink provides the internet connection. Your networking equipment creates the hotspot. A MikroTik router can control users and bandwidth. Outdoor access points distribute the WiFi signal. A billing platform such as Pawa can automate customer access and payment management.
This guide explains the complete process in practical terms for anyone researching how to set up a Starlink hotspot in Kenya, whether the project is for a small estate, apartment building, rural trading centre, lodge, school, office compound, shopping centre, market, or another location where customers need reliable internet access.
What Is a Starlink Hotspot?
A Starlink hotspot is a WiFi network that uses Starlink satellite internet as its internet source and makes that connection available to users within a defined coverage area.
The basic idea is straightforward. Starlink receives internet connectivity through its satellite system. The Starlink equipment then provides network access. For a small home, you can simply connect your phones, laptops, televisions, and other devices to the Starlink WiFi.
A commercial hotspot is different.
Instead of allowing everyone to use one private WiFi password, you create a controlled network where customers can receive internet access according to a specific package or access period. A customer might buy a short session, a daily package, a weekly package, or a longer subscription depending on your business model.
This means the hotspot becomes more than a WiFi router. It becomes a small internet access business.
The Starlink connection is the backhaul. The router is the traffic-control point. Access points provide wireless coverage. The billing system manages who has paid and who is allowed online.
For Kenyan entrepreneurs, this distinction is particularly important because buying a Starlink kit does not automatically create a profitable hotspot business. You still need to design the network around the number of users, expected traffic, coverage area, electricity availability, security, pricing, and maintenance.
Why Use Starlink for a Hotspot Business?
One of the biggest advantages of Starlink is that it can provide connectivity in places where conventional fibre infrastructure may be unavailable, difficult to install, or too expensive to extend.
A business located outside a major urban centre may have a strong customer base for internet but limited fixed-line options. A rural shopping centre, farm, lodge, construction site, school, event venue, or remote office may need an alternative source of connectivity.
Starlink can become the internet source for such a network.
However, the right question is not simply whether Starlink works. The more important question is whether the service and your network design are suitable for the number of users you want to serve.
A small hotspot with a handful of customers has different requirements from a busy trading centre with dozens or hundreds of connected devices.
You should therefore plan the network before purchasing every piece of hardware.
Think about the area you want to cover, the expected number of simultaneous users, the type of content customers will consume, the location of buildings, available power, and where you can safely position the Starlink equipment.
A network serving customers who mostly use WhatsApp and basic browsing has different traffic characteristics from a network serving customers who regularly stream high-definition video, download large files, attend video meetings, or use cloud applications.
Starlink can provide the internet source, but your hotspot still needs intelligent traffic management.
What You Need to Set Up a Starlink Hotspot
Before starting the physical installation, identify the equipment required.
At the simplest level, you need a Starlink kit, an active Starlink service, a suitable location with a clear sky view, power, a networking device, and WiFi equipment.
For a commercial hotspot, a practical setup can include the following:
Starlink dish and Starlink equipment: This provides the satellite internet connection.
Starlink router or integrated WiFi equipment: Depending on your Starlink model, the networking architecture can differ. Starlink Mini, for example, includes integrated WiFi, while other kits can use a separate router.
MikroTik router: This can serve as the hotspot gateway and provide user management, bandwidth control, and the integration point for a billing system.
Outdoor access points: These extend WiFi coverage beyond the immediate location of the Starlink equipment.
Ethernet cabling: Used to connect the Starlink networking equipment, MikroTik router, switches, and access points.
PoE equipment: Depending on your access points, Power over Ethernet can simplify installation by carrying power and data over suitable Ethernet cabling.
Power backup: A UPS, inverter, battery, or solar system can help maintain connectivity when electricity fails.
Billing software: A platform such as Pawa can manage paid access, user packages, renewals, and payment-driven access.
Mounting hardware: Proper mounting equipment is important when placing Starlink or outdoor access points in exposed locations.
The exact hardware list depends on your site. Do not automatically buy the largest router or the most expensive access points. Build around the expected network demand.
Step 1: Choose the Right Location for Starlink
The first physical step in how to set up a Starlink hotspot is finding a suitable location for the Starlink equipment.
Starlink requires a clear view of the sky because the terminal needs to communicate with satellites moving overhead. Trees, buildings, poles, roof structures, and other obstructions can interfere with the connection and cause interruptions.
Starlink itself recommends using the Starlink app’s obstruction tool to evaluate a potential installation location. If the ground does not provide an adequate field of view, the equipment may need to be installed in an elevated position such as a roof, pole, or wall.
This is particularly important for commercial hotspot operators.
If your internet source repeatedly loses connectivity because the dish is poorly positioned, your customers will experience slowdowns or interruptions even if the rest of your network is configured perfectly.
Do not choose a location simply because it is convenient.
Walk around the site and examine the sky. Consider nearby trees, buildings, water tanks, poles, walls, and future construction. A location that looks clear today could become problematic if a tree grows directly into the relevant field of view.
The Starlink app should be used before finalising the installation location.
Step 2: Mount the Starlink Equipment Safely
After choosing the location, install the Starlink terminal according to the equipment instructions.
For a temporary or small installation, the supplied stand may be sufficient if the location is stable and suitable.
For a commercial installation, however, permanent mounting may be preferable.
A rooftop, wall, pole, or other elevated mounting solution may provide a better field of view, but safety must come first. Do not install equipment on a dangerous roof simply to improve signal quality.
A poorly secured dish can become a hazard during strong winds.
Cable routing also matters. Avoid leaving cables hanging loosely across walkways or exposed to unnecessary mechanical stress. Where cables enter a building, protect the entry point from water and ensure the installation remains neat.
Professional installers can be useful when the roof structure is complicated or when the equipment needs permanent mounting.
For Kenyan customers who need professional installation support, SpaceKits Starlink Installation Kenya provides Starlink mounting, activation, cable routing, WiFi testing, and installation support across Kenya. Its current site describes support for homes, offices, lodges, schools, farms, and remote locations.
Step 3: Connect and Power Starlink
Once the terminal is positioned, connect the supplied cables according to your Starlink model.
The exact cable arrangement varies between Starlink generations, so follow the instructions applicable to your specific kit.
For Starlink Mini, the current official setup guide explains that the terminal has integrated WiFi and can be powered using its supplied cable and power supply.
After powering the equipment, give the system time to initialise and establish a satellite connection.
Do not immediately assume that something is wrong if the connection does not appear instantly.
The first setup process may involve the terminal establishing communication and completing configuration.
Open the Starlink app and check the connection status.
The app is also useful for checking obstructions, connection performance, and other network information.
Step 4: Download and Use the Starlink App
The Starlink app is central to the initial setup process.
Download the official Starlink application and follow the installation prompts for your kit.
The official Starlink setup guidance says users can use the app to scan the QR code on the kit packaging and move through the installation process.
The application can help you determine whether your chosen location has obstructions.
It can also help you configure the WiFi network.
This is important because the default Starlink network should not remain your permanent commercial hotspot configuration.
Once you are connected, use the application to set a recognisable network name and a strong password for the Starlink network where appropriate.
For a commercial hotspot, however, the Starlink WiFi should generally not be the final customer-access layer.
Instead, Starlink should provide internet to your network gateway.
That gateway is where your hotspot authentication and billing logic should operate.
Step 5: Test the Starlink Connection Before Building the Hotspot
Do not connect ten other devices before confirming that the Starlink connection itself is healthy.
First test Starlink independently.
Check whether the terminal is online.
Use the Starlink application to inspect the connection and run available speed tests.
Starlink’s current troubleshooting guidance recommends using advanced speed tests to distinguish between the connection from the router to the internet and the connection from a device to the router.
This distinction is extremely useful.
Suppose your Starlink connection to the internet is performing well, but users connected through your hotspot report poor speeds.
That could indicate a WiFi coverage problem, access-point congestion, poor cabling, router configuration, or bandwidth management issue rather than a satellite problem.
Testing the internet source first gives you a baseline.
Record the results.
Later, when the hotspot is fully installed, you can compare them with the results from the customer network.
Step 6: Understand the Difference Between Starlink WiFi and a Commercial Hotspot
This is one of the most important concepts in how to set up a Starlink hotspot.
A Starlink router can provide WiFi.
But a commercial hotspot needs more than ordinary WiFi.
Imagine a customer walks into your coverage area and sees your network.
If the network simply uses a shared password, there is no practical way to know which customer has paid, how much bandwidth they are consuming, when their access should expire, or whether someone is sharing the password with other people.
A hotspot business therefore needs access control.
That is where MikroTik becomes useful.
The Starlink connection can feed your MikroTik router. The MikroTik router can then control the customer network.
Pawa’s current setup guidance explains the architecture clearly: Starlink, fibre, a home router, or another ISP connection can provide internet, while a MikroTik gateway can act as the billing control point.
This means your architecture can look conceptually like this:
Starlink → MikroTik → Switch/Network Distribution → Access Points → Customers
Pawa then operates as the billing and access-management layer connected to the MikroTik environment.
This is significantly more suitable for a commercial WiFi business than simply giving every customer the Starlink password.
Step 7: Connect Starlink to MikroTik
After confirming that Starlink works correctly, connect it to your MikroTik router.
The exact connection method depends on your Starlink generation and router arrangement.
If your Starlink hardware provides an Ethernet connection, connect that network output to the appropriate MikroTik WAN or internet-facing port.
Your MikroTik router then becomes the device responsible for routing customer traffic.
The Starlink router may continue operating in its standard configuration depending on your architecture, but in a more controlled business deployment, you should carefully design the routing arrangement to avoid unnecessary layers of NAT and conflicting DHCP services.
For users who want to connect their own router to Starlink Mini, Starlink’s official guidance supports connecting third-party hardware through the Ethernet port and using bypass mode where appropriate.
However, bypass mode is not something you should enable simply because someone online said it is necessary.
Use it when your network design requires the third-party router to take over routing functions.
If MikroTik is going to be your principal gateway, plan the network first.
Step 8: Configure MikroTik as the Hotspot Gateway
MikroTik is useful because it provides the controls needed to transform an ordinary internet connection into a managed hotspot.
A basic commercial network might have:
Starlink as the internet source.
MikroTik as the gateway.
A switch for wired distribution.
Outdoor access points for WiFi coverage.
Pawa as the billing and access-management platform.
The MikroTik router can handle hotspot authentication, IP addressing, bandwidth limits, and traffic routing.
The precise RouterOS configuration depends on your hardware and network requirements.
You should avoid copying a random configuration from an unrelated YouTube video without understanding what each setting does.
A configuration that works for one router model may not be appropriate for another.
The first objective is to ensure that the MikroTik can receive internet from Starlink.
The second objective is to establish a LAN or hotspot network.
The third is to connect your access points.
The fourth is to connect the billing system.
The fifth is to test customer authentication.
Only after these stages work should you start selling access.
Step 9: Create the Hotspot Network
The customer-facing network should be separate from the management network wherever practical.
This helps prevent customers from accessing network equipment or administrative devices.
For example, your management interface should not be exposed to every customer connected to the WiFi.
Create an appropriate hotspot address range.
Configure DHCP for customer devices.
Configure DNS appropriately.
Set up the hotspot service.
Then test with a phone.
The phone should connect to the customer WiFi and receive an IP address.
If you are using a captive portal, the customer should then be redirected to the login or access page.
This is where a commercial hotspot becomes different from normal home WiFi.
Instead of typing a permanent WiFi password, the customer can be presented with a login, voucher, package selection, or payment workflow.
Step 10: Connect Pawa for Hotspot Billing
If your goal is to create a paid Starlink hotspot, billing is one of the most important parts of the project.
You need a system that can determine:
Who has paid.
Which package they purchased.
How long their access should remain active.
How much bandwidth they should receive.
When their access should expire.
Whether their account should be renewed.
Pawa is designed to work with MikroTik-based hotspot and PPPoE environments. Its current documentation explains that MikroTik acts as the gateway or controller while Pawa handles access-related automation after payment.
This gives your Starlink hotspot a proper commercial structure.
The customer connects to your WiFi.
They see the access page.
They select a package.
They pay.
The billing system confirms payment.
Their access is activated.
When the package expires, access can be suspended or terminated according to the configured rules.
This is far more manageable than manually sending WiFi passwords through WhatsApp.
Step 11: Decide What WiFi Packages to Sell
A hotspot business needs a clear pricing structure.
You do not necessarily need dozens of packages.
In fact, too many options can confuse customers.
Start with a small set of packages that match the habits of your target audience.
For example, a hotspot near a college might have short-term packages for students.
A hotspot in an apartment building might focus on recurring subscriptions.
A hotspot near a market might focus on daily or weekly access.
A rural business centre might use low-cost short sessions.
A lodge may incorporate internet access into accommodation services.
The important thing is to design pricing based on actual demand and operating costs.
Do not copy another hotspot’s prices without considering your own expenses.
Your costs can include Starlink service, equipment, electricity, maintenance, payment processing, site rent, technical support, replacement hardware, and customer support.
Step 12: Estimate Your Starlink Hotspot Business Costs
The cost of setting up a Starlink hotspot can vary substantially.
A small installation may require less equipment than a commercial site covering several buildings.
The major cost categories include:
Starlink hardware.
Starlink subscription.
MikroTik router.
Access points.
Switches.
Ethernet cable.
PoE equipment.
Mounting hardware.
Power backup.
Installation labour.
Billing software.
Site rental or revenue-sharing arrangements.
Security equipment.
A recent Pawa article discussing hotspot business setup gives example Kenyan cost ranges for MikroTik hardware, outdoor access points, cabling, backup power, Starlink hardware, and installation. Those figures should be treated as planning estimates rather than guaranteed current prices because hardware and service costs change.
SpaceKits also publishes a Kenya-focused Starlink packages guide covering kit pricing, installation, accessories, monthly service considerations, and first-year budgeting.
For current Starlink equipment and installation options, you can review SpaceKits Starlink packages in Kenya before making a purchase decision.
The key lesson is that the Starlink dish is only one component of a commercial hotspot.
A Simple Starlink Hotspot Business Budget Example
Suppose you are planning a small hotspot for a property where fibre is unavailable.
You might budget for the Starlink kit, MikroTik gateway, two outdoor access points, cabling, mounting, power backup, installation, and billing system.
Do not think of this as a single equipment purchase.
Think of it as a network.
For example, if your hardware and installation investment totals approximately $1,500, you need to know how many paying customers are required to recover that investment.
If you sell low-cost access packages, you may need many customers.
If you have fewer customers but higher-value subscriptions, you may recover the investment differently.
The right model depends on your market.
A hotspot in an apartment block with twenty paying households is not the same business as a public hotspot near a busy market.
This is why revenue estimates should always be connected to actual customer numbers.
Avoid claims such as “a Starlink hotspot can make thousands every day” without asking how many customers are paying, what package they purchase, how much internet they consume, and what expenses the operator pays.
Step 13: Install Outdoor Access Points
Your Starlink dish does not automatically give you unlimited WiFi coverage.
The physical WiFi coverage of your network depends on the router and access points, the building structure, interference, antenna characteristics, installation height, channel conditions, and the distance between users and equipment.
For a commercial hotspot, outdoor access points are often necessary.
For example, suppose Starlink is installed on one building but customers are located across a compound.
Putting the only WiFi router inside an office may result in weak signals at the far end of the compound.
Instead, use suitable access points placed strategically around the coverage area.
Do not simply install as many access points as possible.
Too many poorly configured access points can create interference and make the network worse.
Think about coverage and capacity separately.
Coverage asks:
“Can the customer receive a signal?”
Capacity asks:
“Can the access point handle the customers using it?”
A strong signal does not necessarily mean excellent internet performance.
Step 14: Position Access Points Correctly
Outdoor access points should be positioned to provide appropriate coverage while remaining protected from unnecessary environmental and physical risks.
Height can help coverage, but higher is not automatically better.
Consider the physical layout.
A market with stalls may require access points positioned above obstructions.
A school may require separate coverage zones.
An apartment compound may need multiple access points to overcome concrete walls.
A lodge may require carefully positioned equipment around guest areas.
Before permanently mounting access points, test the coverage.
Walk around the site using a phone.
Check the signal strength.
Test actual internet performance.
Identify dead zones.
Move the access point if necessary.
It is better to spend additional time testing before drilling mounting holes than to discover after installation that half the intended coverage area has poor service.
Step 15: Use Ethernet Backhaul Where Practical
Wireless backhaul can be convenient, but wired Ethernet connections are often preferable when you are building a fixed commercial network.
A wired connection from the MikroTik or switch to an access point can provide a predictable connection and avoid consuming wireless capacity for backhaul.
Starlink itself supports wired networking arrangements with compatible equipment. Its current Mini guidance explains that the device can connect to third-party hardware through Ethernet, while Starlink also provides options for wired mesh configurations.
For a hotspot, your topology might therefore look like:
Starlink → MikroTik → PoE Switch → Outdoor Access Point 1
and
Starlink → MikroTik → PoE Switch → Outdoor Access Point 2
and so on.
This architecture can be easier to troubleshoot because you can identify individual network segments.
Step 16: Configure Bandwidth Limits
One of the easiest ways to destroy a hotspot business is to allow a small number of heavy users to consume an unreasonable share of the available capacity.
Imagine a hotspot has thirty connected users.
Two users start downloading huge files.
Several others stream video.
Another user starts a video meeting.
The remaining customers may complain that the WiFi is slow.
The problem may not be the Starlink connection itself.
It may be the absence of bandwidth management.
MikroTik can help you control bandwidth according to your business rules.
You can create different packages with different speed limits.
A basic package might receive lower bandwidth.
A premium package might receive more.
The important point is that you should avoid promising a specific speed to every customer unless your network design can realistically deliver it.
Internet speed is shared infrastructure.
Step 17: Configure Customer Authentication
A commercial hotspot needs authentication.
Customers should not be able to connect indefinitely without paying.
The exact authentication mechanism can vary.
You may use hotspot accounts, vouchers, captive portal authentication, or payment-linked accounts.
Pawa can be used with MikroTik to automate access according to customer payments and package status.
This is particularly useful if you do not want to manually activate every customer.
Imagine having 150 customers.
Manually creating usernames, checking M-Pesa payments, and disabling expired customers would quickly become difficult.
Automation turns the process into a repeatable workflow.
Step 18: Connect Mobile Money Payments
For a Kenyan hotspot, M-Pesa is an important part of the customer experience.
The easier it is for a customer to pay, the easier it becomes to convert a visitor into a paying user.
A good hotspot payment process should make it clear:
What the package costs.
How long access lasts.
What the customer receives.
How to pay.
What happens after payment.
How to get help.
Do not make customers send screenshots of payment confirmations unless absolutely necessary.
A payment-integrated billing workflow is more efficient because the system can verify the transaction and activate access.
Pawa’s hotspot billing approach is designed around this type of payment-driven access management through MikroTik.
Step 19: Give Your Hotspot a Professional Name
Your WiFi name is part of your brand.
Instead of using a generic name such as STARLINK-12345, consider a memorable business identity.
For example:
Pawa_WiFi
TownCentre_WiFi
GreenEstate_WiFi
MarketConnect
YourBusiness_WiFi
The name should be easy to remember and easy to communicate.
Avoid using a customer’s private Starlink network name as the public commercial network.
A branded hotspot creates a stronger impression and makes it easier for customers to recognise your service.
Step 20: Secure the Starlink Network
Security is essential.
Do not expose your Starlink administration credentials to customers.
Do not give customers access to the MikroTik administration interface.
Do not use an easy password for administrative accounts.
Separate customer traffic from management traffic.
Change default credentials where applicable.
Use secure passwords.
Keep network equipment updated according to vendor recommendations.
Restrict management access.
If you have a business network, consider creating separate VLANs or logical segments for management, customer access, and other sensitive equipment where your network architecture supports this.
The objective is simple:
Customers should access the internet.
They should not access your router configuration.
They should not see administrative devices.
They should not be able to interfere with other customers.
Step 21: Protect Customer Privacy
A hotspot business handles network activity generated by customers.
You should therefore think seriously about privacy and responsible data handling.
Avoid collecting unnecessary customer information.
If you need customer information for account management, collect only what is necessary and protect it.
Have clear terms for your service.
Be transparent about package duration and limitations.
Do not make claims that your network is completely anonymous or untraceable.
Your business should also understand applicable Kenyan laws, regulations, and obligations relating to telecommunications, data protection, and commercial internet services.
For legal or regulatory decisions, consult appropriate Kenyan professionals and current official regulatory guidance rather than relying solely on a blog post.
Step 22: Add Backup Power
A Starlink hotspot is only useful while the network is running.
Power outages can therefore become a major business problem.
This is especially important in rural areas where electricity interruptions may be frequent.
A basic backup setup could include a UPS.
A larger installation might use an inverter and battery.
A remote location may benefit from solar power.
The correct solution depends on the total power requirements of the Starlink equipment, MikroTik router, access points, switches, and other network hardware.
Do not purchase a backup battery based solely on the Starlink device.
Calculate the requirements for the entire network.
For example, if your network includes several outdoor access points, their power consumption must be included.
If the equipment is powered using PoE, include the PoE switch or injector in the calculation.
A backup system should also be tested.
It is not enough to install a battery and assume it will work during an outage.
Test the actual network under load.
Step 23: Monitor Your Hotspot
Once your hotspot is operating, monitoring becomes essential.
You should know whether:
The Starlink connection is online.
The MikroTik router is functioning.
Access points are reachable.
Customers are connecting.
Customers are receiving the correct bandwidth.
Payments are being processed.
Packages are expiring correctly.
One access point is overloaded.
Another access point has almost no customers.
Monitoring helps you identify problems before customers complain.
If one access point has 50 active users while another nearby access point has only 5, your network may need better load distribution.
If all access points are healthy but the Starlink connection itself is degraded, your problem may be upstream.
The objective is to identify the location of the problem rather than randomly rebooting everything.
Step 24: Test the Hotspot Before Launch
Do not launch the hotspot immediately after installation.
Run a controlled test.
Connect several phones.
Test browsing.
Test social media.
Test video.
Test downloads.
Test payment.
Test package activation.
Test expiry.
Test customer support.
Walk through the entire coverage area.
Check whether customers can connect from expected locations.
Test the network during different periods of the day.
A network that performs well at 9 a.m. may behave differently at 7 p.m. when more customers are online.
You need to understand peak usage.
Step 25: Create a Customer Support Process
Even a well-designed network can experience problems.
Customers may forget their login details.
A payment may take time to reflect.
A phone may connect to the WiFi but fail to open the login page.
A customer may be outside the intended coverage area.
A package may expire unexpectedly because of configuration errors.
You need a simple support process.
Display a support phone number or WhatsApp contact on the login page.
Tell customers what to do if payment is not reflected.
Give clear package information.
Avoid making customers guess how to get help.
Good support can become a competitive advantage.
Two hotspots may offer similar prices and internet performance, but customers often prefer the operator who responds quickly when something goes wrong.
How to Set Up a Starlink Hotspot for an Apartment Building
Apartment buildings can be attractive locations for a managed WiFi service because they provide a concentrated group of potential customers.
Instead of trying to cover an entire neighbourhood, you can focus on one property.
The network might use Starlink as the internet source, MikroTik for access control, Ethernet to distribute connectivity, and access points positioned across the building.
However, apartment buildings present unique challenges.
Concrete walls can weaken WiFi.
Multiple floors may require multiple access points.
Electrical infrastructure may affect installation.
Residents may consume different amounts of bandwidth.
Some tenants may want basic internet while others need heavier usage.
A subscription model may therefore work better than individual hourly vouchers.
Before installing the system, assess the building carefully.
Determine how many apartments you want to serve.
Identify where access points can be mounted.
Determine where cables can run.
Check power availability.
Estimate peak usage.
Then choose your hardware.
How to Set Up a Starlink Hotspot in a Rural Area
Rural areas can be excellent candidates for Starlink-based hotspots because fixed broadband availability may be limited.
A rural hotspot could serve a trading centre, school, lodge, farm, community facility, or business cluster.
The biggest issue is coverage.
Do not assume that putting a Starlink dish on a tall pole means everyone nearby will automatically receive strong WiFi.
Starlink is your internet source.
Your access points determine the local wireless coverage.
If the target area is large, you may need multiple access points.
If buildings are separated by long distances, point-to-point wireless links or additional network infrastructure may be required.
Power is another consideration.
A rural site may benefit from solar backup.
Security is also important.
Outdoor equipment should be physically protected from theft and accidental damage.
How to Set Up a Starlink Hotspot for a School
Schools can use Starlink as a connectivity source where fibre is unavailable or inadequate.
However, a school network requires more careful segmentation than a simple public hotspot.
You may need separate networks for:
Administration.
Teachers.
Students.
Guests.
CCTV.
Other connected equipment.
This reduces the possibility that a guest or student device can directly access sensitive administrative systems.
A school should also consider content management, bandwidth policies, device management, and acceptable-use rules.
For example, administrative traffic may require higher priority than recreational traffic.
A school may want to prevent a few devices from consuming most of the available capacity.
The networking equipment should therefore be designed around the institution’s actual requirements.
How to Set Up a Starlink Hotspot for a Lodge or Airbnb
Hospitality businesses can use Starlink to provide internet to guests, particularly in remote locations.
In this environment, the WiFi service becomes part of the guest experience.
A lodge may choose to provide complimentary WiFi as part of accommodation.
Another property may use paid premium internet packages.
The network should ideally cover guest areas without exposing management systems.
You can create separate access for guests and staff.
Guest access can be controlled through the hotspot system.
A property management platform can handle accommodation operations while the network handles internet access.
The important thing is to avoid combining every business system into one flat network.
How to Set Up a Starlink Hotspot for a Small Business
A small business may use Starlink as its primary internet connection while also offering customer WiFi.
For example, a café might have:
A private staff network.
A guest WiFi network.
A payment system.
Point-of-sale equipment.
CCTV.
Office computers.
All these systems should not necessarily sit on one unrestricted network.
The customer hotspot should be isolated as much as practical.
This protects internal business systems from customer devices.
If the business is using Starlink as a backup connection rather than its primary service, your network can also be designed to switch between internet sources.
Starlink Hotspot vs Fibre Hotspot
A common question is whether Starlink is better than fibre for a hotspot.
There is no universal answer.
Fibre can be an excellent option where it is available and affordable.
Starlink can be attractive where fibre is unavailable or where installation is difficult.
The decision should consider:
Availability.
Monthly cost.
Installation cost.
Reliability.
Expected customer demand.
Latency requirements.
Power consumption.
Business location.
Expansion plans.
A business in a Nairobi building with affordable fibre may not need Starlink as its primary connection.
A lodge in a remote location may have no practical fibre alternative.
Starlink therefore makes the most sense when its unique coverage advantages match your location.
Starlink Hotspot vs 4G or 5G Hotspot
Mobile broadband can also provide internet for a hotspot.
Again, the choice depends on location.
A 4G or 5G connection may be excellent where mobile network coverage is strong.
Starlink may be more attractive in places where cellular coverage is unreliable.
Mobile data plans can also have different data limitations and commercial-use restrictions.
Before choosing your connection, test the alternatives at the actual site.
Do not assume that because a provider advertises 5G in a town, your exact property will receive strong 5G service.
Likewise, do not assume Starlink will automatically solve every connectivity issue.
The site matters.
Common Mistakes When Setting Up a Starlink Hotspot
Mistake 1: Putting the Dish Under Trees
Obstructions can cause interruptions.
Use the Starlink app’s obstruction check before finalising the location.
Mistake 2: Using One Router for a Large Area
One router may not provide sufficient coverage.
Use appropriate access points where necessary.
Mistake 3: Giving Everyone the Same Password
This makes billing and access management difficult.
Use a proper hotspot authentication system.
Mistake 4: Ignoring Bandwidth Management
A few heavy users can affect everyone else.
Use appropriate speed limits and package policies.
Mistake 5: Installing Equipment Without Backup Power
A power failure can take down the entire business.
Plan power resilience.
Mistake 6: Buying Equipment Before Planning
Do not purchase networking hardware simply because it is popular.
Design the network first.
Mistake 7: Promising Unlimited Speed
The actual experience depends on demand, WiFi conditions, network configuration, and the upstream connection.
Set realistic customer expectations.
Mistake 8: Ignoring Security
Customers should not have access to administrative interfaces.
Separate networks where appropriate.
Mistake 9: Failing to Monitor Usage
Without monitoring, you may not know what is causing poor performance.
Mistake 10: Assuming Revenue Equals Profit
Money collected from customers is not the same as business profit.
How to Troubleshoot a Starlink Hotspot That Is Slow
If customers complain that your hotspot is slow, start at the beginning.
First check Starlink.
Is the terminal online?
Does the Starlink app report obstructions?
Does the internet connection perform normally?
Then check the MikroTik.
Is CPU usage unusually high?
Are queues configured correctly?
Is the router overloaded?
Then check the access points.
Are too many users connected to one access point?
Is there interference?
Is the access point positioned correctly?
Then check individual customer devices.
Sometimes the hotspot is working correctly while a customer’s phone has a poor WiFi connection.
Starlink’s current troubleshooting guidance specifically recommends comparing router-to-internet performance with device-to-router performance. This helps determine whether the problem is the internet source or the local WiFi network.
This method is far better than immediately blaming Starlink.
What If Starlink Has Internet but Customers Cannot Connect?
This situation usually points to the local network rather than the satellite connection.
Check whether MikroTik is receiving internet.
Check DHCP.
Check hotspot service status.
Check access point connectivity.
Check the captive portal.
Check whether the billing platform is communicating correctly.
Check whether the customer’s package is active.
Check DNS.
Check firewall rules.
The best troubleshooting approach is to move from the source outward.
Start with Starlink.
Then MikroTik.
Then switch.
Then access point.
Then customer device.
This isolates the failure.
What If Customers Connect but the Login Page Does Not Appear?
This can happen with captive portal environments.
First confirm the customer device received an IP address.
Then check whether DNS is working.
Check the hotspot configuration.
Try opening a normal HTTP page to trigger the portal.
Some devices may behave differently depending on their captive network detection.
Also check whether the customer has an active session already.
If your billing platform controls access, check whether the account was activated successfully.
Do not assume every login-page problem is caused by Starlink.
What If Starlink Keeps Disconnecting?
Check the physical location first.
Use the Starlink app’s obstruction tool.
Trees and structures can interfere with the satellite connection. Starlink recommends selecting a location with a clear view of the sky and using the app to identify obstructions.
Check the cable connections.
Check power.
Check whether the power supply is stable.
Check whether the terminal is overheating or exposed to an unsuitable environment.
Check the Starlink app for connection information.
If the local WiFi remains connected but internet access disappears, compare the router-to-internet test with the device-to-router test.
This helps distinguish between satellite connectivity and local WiFi problems.
How Many Customers Can a Starlink Hotspot Support?
There is no single universal number.
This is because the number of customers a hotspot can support depends on several variables.
The first is the Starlink service and real-world performance at the site.
The second is what customers are doing online.
Ten customers performing basic browsing can create less demand than ten customers streaming high-resolution video.
The third factor is your router.
The fourth is the WiFi infrastructure.
The fifth is bandwidth policy.
The sixth is peak concurrency.
Therefore, do not market your hotspot by saying “Starlink supports exactly X users.”
Instead, test your network and monitor actual usage.
Start with a controlled number of customers.
Observe peak performance.
Increase customer numbers gradually.
Upgrade the network when the data indicates that capacity is being reached.
How to Make a Starlink Hotspot Profitable
Profitability begins with choosing the right location.
A hotspot in an area where everyone already has cheap fibre may struggle.
A hotspot in a location where customers have few alternatives may have a stronger proposition.
The second factor is pricing.
Your packages must cover your operating costs while remaining attractive to customers.
The third factor is customer density.
You need enough potential users within your coverage area.
The fourth is network quality.
Customers will not keep paying for a service that repeatedly fails.
The fifth is operating efficiency.
Automated billing reduces the time required to manage accounts.
The sixth is expansion.
Once the first site becomes stable, you can consider adding additional access points or deploying the same model at another location.
Example of a Practical Hotspot Revenue Model
Consider a hypothetical hotspot serving customers around a small commercial centre.
Suppose the operator has 100 registered customers.
Not all 100 customers will be online simultaneously.
Some may purchase short packages.
Others may buy weekly access.
Some may become recurring subscribers.
The operator might therefore generate a combination of small payments throughout the month.
The business owner should track:
Total collections.
Starlink subscription cost.
Electricity.
Power backup.
Maintenance.
Billing fees.
Equipment replacement.
Site expenses.
Marketing.
Support.
The remainder is operating profit.
This is more useful than simply saying the hotspot can “make a lot of money.”
The actual business question is whether the amount left after expenses justifies the investment and operational effort.
How Pawa Helps Manage a Starlink Hotspot
A Starlink connection by itself does not provide a complete commercial billing system.
Pawa adds the business-management layer needed for a paid hotspot.
Its current setup documentation explains that the internet source can be Starlink, fibre, a home router, or another ISP, while MikroTik serves as the gateway for controlling Hotspot or PPPoE customers.
This is useful because the billing system can be separated from the satellite connection.
Starlink remains responsible for bringing internet to your site.
MikroTik manages network access.
Pawa handles the commercial workflow.
The access points provide the actual WiFi coverage.
This modular architecture makes the system easier to expand.
You can potentially change your internet provider while keeping the customer network architecture.
For example, if fibre becomes available at a location where you currently use Starlink, the internet source could potentially change while MikroTik and the billing layer continue serving the customer network, subject to the appropriate configuration and service terms.
Why MikroTik Matters for a Starlink Hotspot
A standard home router is designed primarily to connect devices to the internet.
A commercial hotspot has more complex requirements.
You need to control users.
You need bandwidth policies.
You need authentication.
You need access expiry.
You may need queues.
You may need firewall rules.
You may need multiple networks.
You may need integration with a billing platform.
MikroTik RouterOS is built for this kind of networking environment.
Pawa’s own documentation states that its system requires MikroTik as the billing gateway rather than relying on a normal home router as the primary billing controller.
That is an important architectural point for anyone learning how to set up a Starlink hotspot.
Do not confuse the WiFi router that comes with your Starlink system with the network controller required for a commercial billing operation.
Should You Use Starlink’s Built-In WiFi?
For a small home network, the built-in WiFi can be convenient.
Starlink Mini, for example, has integrated WiFi and does not require a separate router simply to get online.
But a commercial hotspot may require more advanced control.
If your objective is to serve many users across a wider area, you will likely need additional networking equipment.
That does not mean the Starlink router is useless.
It can still be part of the architecture depending on the model and configuration.
However, your final network design should ensure that customer traffic passes through the appropriate gateway where billing and access policies can be enforced.
How to Connect a Third-Party Router to Starlink
Starlink supports third-party router configurations through compatible Ethernet connections.
For Starlink Mini, the official documentation explains that a third-party router can be connected through the Ethernet port, with bypass mode available when the integrated router needs to be disabled in favour of third-party routing.
The important point is to understand why you are changing the configuration.
If MikroTik is your main gateway, you need to design the connection so that routing, DHCP, NAT, and firewall responsibilities are not accidentally duplicated.
Two devices both trying to act as the main router can create unnecessary complexity.
If you are not comfortable with RouterOS networking, professional configuration can save significant troubleshooting time.
When You Should Consider Professional Starlink Installation
DIY installation can be practical for a straightforward site.
Professional installation becomes more valuable when:
The roof is difficult to access.
The dish requires permanent mounting.
The cable route is complicated.
The network covers multiple buildings.
Outdoor access points need installation.
Power backup needs integration.
The business cannot afford extended downtime.
The customer network needs professional configuration.
SpaceKits provides installation and support for Kenyan Starlink users, including mounting, activation, cable routing, testing, and WiFi optimisation.
You can also review SpaceKits Starlink installation services when comparing installation and package options.
For customers who already have equipment and only need installation assistance, SpaceKits states that it can handle the installation process without requiring the customer to purchase a new kit from the installer.
Where to Buy Starlink Equipment for a Hotspot in Kenya
When purchasing Starlink equipment, verify what is included.
The kit model matters.
The availability of accessories matters.
Mounting requirements matter.
The network design matters.
You should also consider whether you need professional installation.
SpaceKits publishes information about Starlink kits and related installation services in Kenya. Its Starlink kit guide discusses equipment for homes, offices, and businesses.
For a broader overview of available equipment and installation packages, visit SpaceKits Starlink kits and installation support.
Before buying, make sure you understand whether you need the Mini, Standard, mounting equipment, additional Ethernet accessories, or another configuration.
How to Set Up a Starlink Hotspot Step by Step: Quick Checklist
If you want the shortest practical version of this guide, follow this sequence.
First, choose a site with a clear view of the sky.
Second, install the Starlink terminal securely.
Third, connect power.
Fourth, install and open the Starlink app.
Fifth, connect your phone to the Starlink WiFi.
Sixth, configure the network name and password.
Seventh, confirm that Starlink is online.
Eighth, test the internet connection.
Ninth, connect Starlink to your MikroTik gateway.
Tenth, configure the MikroTik hotspot network.
Eleventh, connect your switches and outdoor access points.
Twelfth, configure bandwidth controls.
Thirteenth, integrate Pawa for customer billing and access management.
Fourteenth, connect your payment process.
Fifteenth, create customer packages.
Sixteenth, test customer authentication.
Seventeenth, test package activation.
Eighteenth, test package expiry.
Nineteenth, test coverage around the site.
Twentieth, launch only after confirming the network works reliably.
This is the practical sequence for how to set up a Starlink hotspot.
Starlink Hotspot Network Diagram
A basic commercial architecture can be understood like this:
Starlink Dish
↓
Starlink Internet Connection
↓
MikroTik Gateway
↓
Switch / PoE Distribution
↓
Outdoor Access Points
↓
Customer Devices
And alongside the MikroTik gateway:
Pawa Billing System
↓
Customer Package + Payment + Access Control
This architecture separates the major functions.
Starlink provides the internet.
MikroTik manages network traffic and access.
Pawa manages billing automation.
Access points provide WiFi.
Customers use the network.
That separation makes the system easier to understand and expand.
How to Set Up a Starlink Hotspot With Multiple Access Points
A larger hotspot may need multiple access points.
Suppose you want to cover a market with several sections.
You could install one access point near the main building, another near the centre, and another toward the far end.
But the access points should not be placed randomly.
Map the coverage area.
Identify physical barriers.
Identify areas where users will actually gather.
Install access points based on expected user density.
Then test.
If one access point is overloaded while another is underused, adjust placement or configuration.
The objective is not to maximise the number of access points.
The objective is to provide reliable service using an efficient design.
How to Set Up a Starlink Hotspot With Mesh WiFi
Mesh networking can be useful in certain environments.
Starlink supports mesh options with compatible equipment. The official documentation explains wireless and wired mesh approaches for supported Starlink equipment.
However, a commercial hotspot should not automatically use mesh just because mesh sounds easier.
A wired Ethernet backhaul may be preferable where cabling is practical.
Wireless mesh consumes wireless capacity for communication between network nodes.
For a large business hotspot, a properly designed wired infrastructure can provide more predictable performance.
Use mesh when it solves a specific deployment problem.
How to Set Up a Starlink Hotspot With Solar Power
Solar power can make Starlink attractive in remote locations.
But solar design requires more than buying a solar panel.
You need to consider:
Starlink power consumption.
Router power consumption.
Access point power consumption.
Switch consumption.
Battery storage.
Inverter losses if using AC equipment.
Solar generation.
Weather conditions.
Desired backup duration.
The network may operate during daylight and continue running from batteries after sunset.
For a commercial hotspot, uptime matters.
A battery system should therefore be sized around the entire network rather than the Starlink dish alone.
Where possible, reducing unnecessary power conversion can improve efficiency.
The exact electrical design should be handled by a qualified professional when larger systems are involved.
Is a Starlink Hotspot Worth It in Kenya?
A Starlink hotspot can be worthwhile when the location has sufficient demand and limited alternatives.
It can be particularly attractive in remote or underserved areas.
But Starlink does not automatically make a hotspot profitable.
The business depends on customers.
If you invest heavily in equipment but only have a few paying users, recovering your investment can take a long time.
You should therefore perform a site survey before investing.
Ask:
How many potential customers live or work nearby?
What internet options do they currently have?
What do they pay?
Are they dissatisfied with existing options?
What times do they need internet?
Would they prefer daily, weekly, or monthly packages?
How much can they realistically pay?
How much will electricity cost?
How much will equipment maintenance cost?
Once you answer these questions, the business case becomes clearer.
How to Market Your Starlink Hotspot
Once your network is ready, customers need to know that it exists.
Start with the immediate area.
Place visible signs.
Tell nearby businesses.
Tell residents.
Use WhatsApp.
Create a Google Business Profile where appropriate.
Use social media.
Offer introductory packages without pricing your service below sustainable levels.
Make your WiFi name visible.
Customer referrals can become powerful.
If someone gets reliable internet at an affordable price, they may recommend it to neighbours and colleagues.
However, do not market the service using unrealistic claims.
Instead of saying “fastest internet in Kenya,” explain exactly what customers receive.
For example:
“Affordable WiFi packages with reliable access around this compound.”
Clear claims are more credible than exaggerated advertising.
How to Reduce Customer Churn
Getting customers is only one part of a hotspot business.
Keeping them matters just as much.
Customers leave when:
The internet is unreliable.
Packages are confusing.
Payments fail.
Support is poor.
The network is slow.
The price is too high.
The service does not match expectations.
To reduce churn, focus on consistent performance.
Monitor your network.
Respond to complaints.
Keep pricing simple.
Make payment easy.
Improve coverage when necessary.
Communicate downtime.
If customers trust your service, they are more likely to renew.
How to Scale a Starlink Hotspot Business
Once your first site is stable, you can consider expansion.
Do not immediately buy equipment for five more locations.
First understand your first location.
Measure customer numbers.
Measure revenue.
Measure operating expenses.
Measure support requests.
Measure network performance.
Determine whether the business model is repeatable.
If the first site consistently generates enough revenue to justify its costs, you can consider another location.
You may also discover that your biggest opportunity is not opening another site but increasing the capacity of the existing one.
For example, you may need additional access points.
Or you may need better bandwidth management.
Or you may need stronger power backup.
Or you may need improved customer packages.
Scale based on evidence rather than assumptions.
Four Useful SpaceKits Resources for Starlink Hotspot Planning
If you are in Kenya and need equipment or professional installation support, several SpaceKits resources can complement this guide.
The first is the main SpaceKits Starlink installation service, which provides information about installation, mounting, activation, cable routing, testing, and support.
The second is the SpaceKits Starlink packages and pricing guide, which is useful when planning hardware, mounting, installation, service-plan, and first-year costs.
The third is the SpaceKits Starlink kit guide, which provides information about Starlink equipment and installation for Kenyan homes, offices, and businesses.
The fourth is the SpaceKits contact page, which provides a direct route for customers who need installation, equipment, or support information.
These four links give readers different next steps instead of repeatedly pointing them to the same homepage.
How Pawa Fits Into the Starlink Hotspot Business
Pawa is especially relevant when the goal is not simply to use Starlink at home but to sell WiFi access to customers.
Starlink solves the connectivity problem.
Pawa helps solve the billing problem.
MikroTik helps solve the network-control problem.
Access points help solve the coverage problem.
Power backup helps solve the uptime problem.
Together, these components form a complete hotspot business infrastructure.
This is why you should not approach how to set up a Starlink hotspot as though it means “connect a dish and share a password.”
A real commercial hotspot requires a network architecture.
The internet source is only the beginning.
What Makes a Good Starlink Hotspot Business Location?
Location is arguably more important than the brand of router you purchase.
A strong location has three characteristics.
First, there are enough potential customers.
Second, existing internet options are limited, expensive, unreliable, or inconvenient.
Third, customers have a reason to pay for your service.
Potential locations include:
Apartment compounds.
Student housing.
Rural trading centres.
Markets.
Lodges.
Farms.
Schools.
Construction camps.
Events.
Offices.
Remote project sites.
Small shopping centres.
The ideal location depends on your business model.
For a public hotspot, customer foot traffic matters.
For residential WiFi, the number of households matters.
For a lodge, guest occupancy matters.
For a school, student and staff requirements matter.
How to Calculate Your Hotspot Break-Even Point
You should know approximately how long it will take to recover your investment.
Start by calculating the total initial investment.
Include equipment, installation, mounting, cabling, power backup, and setup.
Then calculate monthly operating expenses.
Include Starlink service, electricity, maintenance, payment-related costs, support, and site costs.
Then estimate realistic monthly collections.
Do not use your best month.
Use a conservative average.
If your monthly collections are only slightly higher than your monthly operating expenses, the business may not be attractive enough.
If there is a healthy difference, you can use the surplus to recover the original investment.
Once the initial investment has been recovered, the business becomes more attractive, although equipment replacement and ongoing costs still apply.
This approach is more reliable than focusing on gross revenue.
Why You Should Not Promise “Unlimited” Performance
Many internet businesses use the word unlimited.
But customers often interpret unlimited as “I can do anything at maximum speed without affecting anyone else.”
That is not how shared networks work.
A hotspot has finite capacity.
If dozens of customers simultaneously consume large amounts of bandwidth, the available capacity is divided among them.
Your business should therefore explain packages clearly.
You can sell access based on time, speed, usage policy, or subscription period depending on your setup and applicable service terms.
The important thing is to avoid creating unrealistic expectations.
How Weather Affects Your Starlink Hotspot
Starlink equipment is designed for outdoor use, but weather and environmental conditions can still affect performance and installation requirements.
Heavy rain can influence satellite communications.
Strong winds can stress poorly mounted equipment.
Water can damage improperly routed or protected cables.
Dust and physical exposure can affect equipment over time.
For commercial installations, proper mounting and cable management are therefore important.
If you use third-party Ethernet cabling with certain Starlink Mini configurations, pay attention to Starlink’s specific weatherproofing guidance. Starlink notes that using a third-party RJ45 cable with the Mini can affect its waterproof rating, and recommends appropriate Starlink cabling for certain installations.
This is a good example of why simply finding a cable that fits is not always enough.
Starlink Hotspot Maintenance Checklist
A good hotspot requires regular maintenance.
Check the Starlink connection.
Check the dish and mounting.
Check cables.
Check the MikroTik router.
Check access points.
Check PoE equipment.
Check power backup.
Check customer complaints.
Check bandwidth usage.
Check payment automation.
Check package expiry.
Check whether equipment needs updates according to manufacturer guidance.
Check physical security.
A monthly inspection can identify issues before they become major failures.
The Most Important Lesson About How to Set Up a Starlink Hotspot
The most important lesson is that a Starlink hotspot is not simply a Starlink dish with a password.
It is a network business.
Starlink supplies the upstream internet.
MikroTik provides the control layer.
Access points provide coverage.
Pawa automates billing and customer access.
Power infrastructure keeps the system running.
Good installation protects the hardware.
Monitoring keeps performance stable.
Customer service keeps users coming back.
If any one of these components is neglected, the business can struggle.
Frequently Asked Questions About How to Set Up a Starlink Hotspot
1. How do I set up a Starlink hotspot?
To set up a Starlink hotspot, connect Starlink, join its WiFi, configure it in the Starlink app, then connect a MikroTik router and access points to distribute and manage customer internet access.
For a paid hotspot, integrate the MikroTik network with Pawa so customers can purchase packages and receive access according to their payments.
2. Can I use Starlink for a WiFi hotspot business?
Starlink can provide the internet connection for a WiFi network, but the suitability of using a particular Starlink service for commercial hotspot operations depends on the applicable Starlink service terms and your network requirements.
For a commercial deployment, you should also consider customer demand, bandwidth consumption, equipment capacity, power availability, and the local market.
3. Do I need MikroTik for a Starlink hotspot?
If you want a properly managed paid hotspot with automated user access and billing through Pawa, MikroTik is an important part of the architecture. Pawa’s current setup documentation states that the billing gateway uses MikroTik RouterOS to manage Hotspot or PPPoE access.
For simple private Starlink WiFi, MikroTik is not necessarily required.
4. Can Pawa work with Starlink?
Yes. Pawa’s current setup documentation specifically explains that the internet source can be Starlink, fibre, a home router, or another ISP connection, with MikroTik providing the gateway and access-control layer.
This makes Pawa suitable for a Starlink-powered hotspot architecture where customers need controlled, paid internet access.
5. How far can a Starlink hotspot reach?
There is no single distance that applies to every Starlink hotspot.
The Starlink terminal provides the internet connection, while the local WiFi coverage depends on your router, access points, antenna design, installation position, physical barriers, interference, and network architecture.
For larger coverage areas, use appropriately designed outdoor access points rather than assuming the Starlink router alone will cover the entire property.
6. Can I run a Starlink hotspot in a rural area?
A rural location can be a strong use case for Starlink where suitable terrestrial internet alternatives are limited.
However, you still need to plan local WiFi coverage, power, equipment security, customer demand, and maintenance.
A rural hotspot may also benefit from solar or battery backup where electricity is unreliable.
7. Can I connect Starlink to MikroTik?
Starlink can be integrated with third-party networking hardware using compatible Ethernet connectivity. Starlink’s official Mini documentation describes connecting third-party routers through Ethernet and using bypass mode when appropriate.
The correct configuration depends on your Starlink hardware and MikroTik network design.
8. Do I need outdoor access points?
If you want to cover a large compound, market, school, apartment block, lodge, or multiple buildings, additional access points are often necessary.
The Starlink connection itself does not determine your entire local WiFi coverage.
Your access-point design should be based on physical coverage and expected customer density.
9. Can I use the Starlink Mini for a hotspot?
Starlink Mini includes integrated WiFi, so it can provide connectivity without a separate router for basic use.
For a commercial hotspot, however, you may still need additional networking equipment such as MikroTik and external access points depending on the number of customers and coverage area.
10. Why is my Starlink hotspot slow?
Slow performance can result from Starlink connectivity, obstructions, WiFi coverage, access-point congestion, poor network configuration, excessive customer usage, or inadequate bandwidth controls.
Start by testing Starlink itself.
Then test the connection between the router and customer device.
Starlink’s advanced speed-test guidance can help distinguish between upstream internet performance and local WiFi performance.
11. How can I prevent one customer from using all the bandwidth?
Use bandwidth management on your MikroTik router and create appropriate limits for your packages.
This prevents a small number of heavy users from consuming disproportionate capacity.
Your limits should be based on your actual Starlink performance and the number of simultaneous customers.
12. Can I sell daily WiFi packages?
Your hotspot can be structured around different package models depending on your target customers and applicable service terms.
Daily packages can work in areas where customers need short-term access.
Weekly and monthly packages may work better for residents or regular users.
The best option depends on your market.
13. How do customers pay for a Pawa hotspot?
The payment workflow depends on the configured Pawa and MikroTik setup. The goal is to allow customers to select an internet package, make payment, and have their access activated through the connected billing system.
This reduces the need for manual activation.
14. Should I use Starlink or fibre for my hotspot?
Use whichever internet source provides the best combination of availability, reliability, cost, capacity, and suitability for your location.
If fibre is readily available and affordable, it may be a strong choice.
If you are in a location where fibre is unavailable or difficult to install, Starlink can be an attractive alternative.
15. How much does it cost to set up a Starlink hotspot?
There is no universal price because the cost depends on Starlink hardware, installation, MikroTik equipment, access points, cabling, mounting, backup power, and other requirements.
For current Kenya-focused equipment and installation information, review the latest SpaceKits package information rather than relying on old prices.
Final Verdict: Is a Starlink Hotspot Worth Setting Up?
A Starlink hotspot can be a practical business opportunity in Kenya when it solves a real connectivity problem.
The strongest opportunity is not necessarily in a neighbourhood where customers already have several affordable fibre options.
It may be in a place where customers need internet but have limited choices.
That could be a rural shopping centre.
It could be an apartment compound.
It could be a lodge.
It could be a school.
It could be a farm.
It could be a construction site.
It could be a remote office.
The business becomes attractive when there is a clear gap between customer demand and available connectivity.
But you should not treat Starlink as a magic money-making machine.
The equipment does not create customers.
The dish does not create a billing system.
The WiFi signal does not guarantee profitability.
A successful hotspot requires planning.
You need to understand your customers.
You need to choose the right location.
You need reliable equipment.
You need appropriate network design.
You need bandwidth management.
You need simple payment.
You need good customer service.
You need monitoring.
And you need to control costs.
That is why learning how to set up a Starlink hotspot properly matters.
A poorly designed network can waste money even if the Starlink connection itself is excellent.
A well-designed network can turn Starlink into the upstream connection for a professional WiFi service.
Start Your Starlink Hotspot With Pawa
If your objective is simply to connect your home to satellite internet, Starlink’s standard setup process may be enough.
But if your objective is to sell WiFi access, you need a different approach.
You need a commercial hotspot architecture.
Starlink provides the internet.
MikroTik controls the network.
Access points distribute the signal.
Pawa manages customer billing and access.
That combination provides a much more structured foundation for a WiFi business.
Before buying equipment, identify your location, customer numbers, coverage requirements, expected usage, power situation, and budget.
Then build the network around those facts.
If you need Starlink installation or hardware support in Kenya, review SpaceKits Starlink installation and setup support.
If you want to understand current Starlink equipment and package options, see SpaceKits Kenya Starlink packages.
If you already have a kit and need installation information, the SpaceKits Starlink kit guide is another useful resource.
And if you need to discuss installation or equipment requirements directly, use the SpaceKits contact page.
For the actual hotspot billing and customer-access side, start with Pawa WiFi Business Setup and build your network around MikroTik, controlled access, customer payments, and measurable bandwidth usage.
Conclusion
Learning how to set up a Starlink hotspot starts with a simple process: position the Starlink equipment with a clear view of the sky, power it, connect through the Starlink app, and verify the internet connection.
But a commercial hotspot requires much more.
You need to transform that internet connection into a controlled customer network.
The practical architecture is straightforward:
Starlink → MikroTik → Access Points → Customers
with:
Pawa → Billing + Packages + Customer Access
Once you understand this architecture, the project becomes easier to plan.
The Starlink terminal handles the satellite connection.
The MikroTik router becomes the network gateway.
The access points extend coverage.
Pawa manages customer access and billing.
A suitable power system keeps the network running.
Monitoring helps you maintain performance.
Good customer service keeps users coming back.
The most important thing is to start with the business problem rather than the equipment.
Do not begin by asking, “Which router should I buy?”
Start by asking:
Who are my customers?
Where are they?
What internet do they currently use?
What are they willing to pay?
How many people will connect at the same time?
How much coverage do I need?
What happens when power goes out?
How will customers pay?
How will access expire?
How will I control bandwidth?
How will I support customers?
Once those questions are answered, selecting the hardware becomes much easier.
For a small home network, Starlink’s built-in WiFi may be sufficient.
For a commercial hotspot, a structured Starlink, MikroTik, access-point, and Pawa architecture can provide the control required to operate a more professional service.
That is the real answer to how to set up a Starlink hotspot: connect Starlink correctly, build a properly managed local network around it, automate customer access and billing, and design the business around the actual needs of your location.
If you are ready to turn Starlink connectivity into a managed WiFi business, visit Pawa.co.ke and explore how Pawa can help you manage your hotspot customers, payments, packages, and access through MikroTik.